|
Everyone's a
specialist nowadays. That's the old gripe. As A physician, I
hear it every day. But medicine doesn't have a monopoly on specialization.
In fact, when it comes to esoteric careers, the world of photography
boast many job descriptions that are, well highly focused. And
sub-specialization is common place. I know one guy who gets a
little offended if you describe him as a food photographer; as
he's quick to remind you, he's a dessert photographer. If current
trends continue, he'll probably end up even more specialized,
photographing only frozen chocolate desserts.
Despite the narrow careers in this business, photographers remain
united by a common goal: to control light. We all manipulate
light, i.e., herding photons down lens hoods, through filters
and wads of lenses.
Controlling light at its source, even before it reaches the subject,
obviously provides the photographer with terrific artistic control.
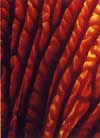
Especially in macrophotography- one of my own favorite niches-
the photographer can maximize this control, since the subjects
(and hence the areas requiring illumination) are small. What
follows are some simple, inexpensive lighting techniques I've
found effective in outdoor close-up work.
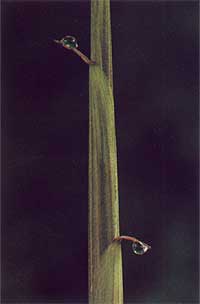
Made in the Shade?
Nature photographers like myself are often pale-looking folks,
since we have a tendency to concentrate our shooting in early
morning and late afternoon, fleeeing the sun like vampires. Why?
One reason is that the direct sunlight of midday makes for very
contrasty pictures, full of harsh shadows and / or washed-out
highlights. True, the interplay of shadow and light can sometimes
strengthen an image, but just as often obscures subject details.
By shooting at dawn and early evening, shadow problem are minimized,
thanks to the diffused quality of the light. Similar diffusion
results when a thin layer of clouds roll over a sunny sky, yielding
the oft-mentioned but too-seldom-seen "bright overcast."
If you limit your photography to dawn, dusk, and overcast days,
you'll miss incredible number of picture opportunities. My solution:
Why wait for diffuse lighting when you can make your own? Small
areas of harsh , direct light can be readily converted into pleasantly
diffused light in a variety of ways. One straightforward approach
is simply to block the light, casting the subject completely
into shadow.
For several reasons, total shadow is not the ideal solution.
True, it is certainly reduces the contrast problem, but at a
price. First, it may reduce the contrast too much. When available
light is highly diffused ( as it is in shade), the small highlights
and shadows that normally enhance surface texture may disappear,
causing a subject to lose its three-dimensional appearance- hence
the expression "flat lighting." Also, shaded subjects
obviously require a longer exposure than fully sunlit ones- two
to three stops longer when going from full sun to complete shade.
Throw in a little lens extension ( to provide close up magnification)
and slow film ( necessary in today's editorial market), and extremely
long shutter speeds may result. My slide collection is full of
8 - 20 second exposures.
A sturdy tripod and cable release make long exposures manageable,
but accurately computing very long shutter speeds can be a little
dicey. While most SLRs will meter down to 1 or 2 seconds, the
metering scale on many models stops there. One solution is to
double or quadruple the ISO setting on the camera, meter the
scene again, then divide the resulting shutter speed by two or
four, resulting shutter speed by two or four, respectively. Alternatively,
a good hand held meter will usually be able to register exposure
down to 20 seconds or so without difficulty. |
Especially with Kodachrome emulsions, long
exposures sometimes may
result in strangely tinted images. Some of this is simply due
to the color
temperature of the light reaching the shaded subject. Consider
a white flower growing under a canopy of deciduous trees: The
layer of green high overhead not only blocks sunlight, it filters
it, shifting its spectrum ( and
hence the apparent color of the flower ) toward blue-green. Also,
the
phenomenon of reciprocity failure (RF) may influence the color
, particularly with very long exposures. RF occurs because different
dyes in the emulsion do not react to light at the same rate.
Although RF is minimal with short exposures- less than one second
- the longer exposure, the more pronounced the effect. RF can
be combatted by intentionally lengthening the exposure ( I usually
expose at 1 ½ times the calculated shutter speed)
and adding filters.
MODIFIED SHADE
In short, casting your subjects into total shade is not the best
solution for strong, direct light. Many of the problems of full
shade can be ameliorated, however, by selectively restoring a
little light to shaded subject. How? Using a fill-in flash is
one option. After a few years of fighting with NiCds that never
lasted as long as they were supposed to, too-heavy battery packs,
a series of defective flash cords, and time-wasting calculations
of flash power and f-stop ratios, I abandoned high technology
for something a little more primitive: a piece of corrugated
cardboard
covered with aluminum foil. I invite, fill-in flash users to
guffaw heartily; I've published plenty of photos illuminated
this way.
The technique is simple. After blocking all the sunlight falling
on a
subject-say, by standing between the sun and the subject - hold
the reflector
off to the side, angling a beam of light back onto the subject.
The beam from this sort of reflector is agreeably diffuse, especially
if the foil has been crinkled before applying it to the backing.
The intensity of the light
can be varied simply by changing the angle of the reflector and
its distance
from the subject.
Don't count on getting a big change in exposure with this sort
of fill-in. A gain of one f-stop or less is the rule, unless
you're reflecting
strong, direct sunlight. Nonetheless, improved subject texture
and detail
are usually visible in the final picture. And by carefully aiming
the fill-in light, it's possible to isolate the subject from
the dimly lit
background, further enhancing its three dimensional quality.
A final bonus: When photographing wildflowers , the reflectors
act as a windbreak.
If aluminum is just to reflective for your tastes, a plain white
care will provide more subtle bounced lighting. I prefer Bristol
board, a heavy grade of drawing board available a most art supply
houses. Because it is much less reflective than aluminum foil,
a white card works best with very strong available light. Even
with this lighting, you'll probably have to hold the card very
close to the subject to see and effect.
By positioning an aluminum reflector one side of a subject and
a white
card ( or second foil reflector) on the other , one can simulate
multiple
fill-in flashes. I won't lie-setting up two different reflectors
and simultaneously operating the camera takes some practice.
But multiple
flashes are even more awkward, usually demanding special brackets,
extension cords, and / or tolerant assistant. I've folded my
reflectors in half, like giant greeting cards, so they can stand
up on their own. This frees at least one hand, allowing me to
operate the camera with a cable release while positioning a second
reflector with my other hand. |
An even simpler way to stimulate bright overcast
is by passing sunlight through a translucent material such as
cloth or plastic. Still looking for a gift for the Photographer
Who Has Everything? You may have seen ads for a little diffusion
tent, specially designed for close-ups subjects. The tent, which
is erected over the subject, is made of a diaphanous fabric that
converts blaring sunlight into soft, evening lighting. I'm sure
it's very effective, but personally I have little desire to erect
a tent for every
close-up picture. My answer is simpler. I carry a sheet of clear
plexiglass, heavily scratched on both sides with steel wool.
These scuffmarks greatly diffuse light passing through the plastic.
With strongly lit subjects, simply hold the plastic between the
sun and the subject-you get
instant diffusion, and no risk of putting out an eye with a tent
pole.
Some photographers I know carry a small white umbrella for diffusion.
I've tried it, and it works fine. Hanging onto the diffuser can
sometimes be challenging, however, on windy days. On the other
hand, this approach has
the added advantage of waterproofing the photographer and his
equipment in the event of unexpected showers.
IT'S ALL DONE WITH...
Consider an object silhouetted by setting sun. How can you bring
out details on the subject without grossly overexposing the background-and
without using fill-in flash? You could try bouncing light back
onto the subject with aluminum foil reflector, but you probably
won't get enough reflection- the subject would still end up a
few f-stops short of the
background. A better solution is bounce the light with a mirror.
Granted,
the thought of a fragile sheet of plate glass colliding with
lenses in you gadget bag does not seem too desirable. Fortunately
, high technology has made that risk unnecessary. Most glass
suppliers carry "plexy mirrors" that is, clear plastic
backed by silvery, mirrorlike Mylar. Not only are these
mirrors shatterproof, they're also cheap and much lighter than
their glass counterparts.
In very poorly lit settings, a mirror is a much more efficient
reflector than aluminum foil. You don't need a big one. The one
I carry is about 8 x 12 inches, ample for every situation that
has required its services.
Although it cannot be neatly folded up for storage, its versatility
makes up for this small impracticality. I've glued a sheet of
white paper to the back of my mirror, so it doubles as a white-card
reflector. If you're the type
who simply must have an 18% gray card at all times, you could
glue that on,
instead.
I've also used mirrors for background control. In particular,
a mirror can help create a suitable background where one doesn't
exist. With flowers or other small subjects, a uniform, out-of-focus
background helps simplify composition, calling attention to the
colors and geometry of the subject
itself. Unfortunately, such backgrounds are not always around
when you need them. And it may not be ethical (or even possible!)
to uprooted the subject, in order to reposition it in front of
a desirable background. A
mirror lets me bring in the background I want without moving
anything.
The process is straightforward. First, focus the camera on the
subject.
Next, position the mirror facing the camera, on the far side
of the subject. By pivoting the mirror (like a door), all the
while keeping it directly behind the subject, a photographer
can often "drag" more aesthetic scenery into the background
of the image. Ideally, the mirror should reflect scenery
that is as far away as possible; because of the narrow depth
of field common to close-up lenses, this will ensure that the
background |
will appear out of focus in the final picture.
Once I was trying to photograph the tip of a small bamboo shoot
emerging in my lawn. The background was a jumbled, distracting
mess of tall grass, too close and too contrasty to blur by using
a wide aperture. The mirror didn't help either not matter how
I turned it, all it showed me was more confusing, trangled grass.
So I selected a very slow shutter speed, positioned the mirror
in the background (reflecting some grass off to the side) and
wiggled it slightly during the shot. In the final picture, my
subject stands out against a soft unfocused background of green.
I've used this trick successfully many times. The hardest part
is keeping the edge of the mirror from showing up in the picture,
since it's tricky to shake the mirror while looking through the
viewfinder.
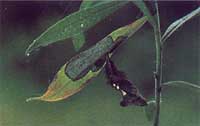
RIMLIGHTING
Backlighting or rimlighting of small subjects can also be accomplished
with mirrors. This technique can be quite effective when photographing
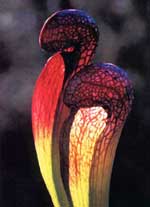
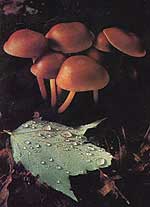
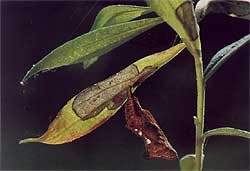
leaves, flowers, or mushrooms. Many fungi, I have found have
marvelous
translucent quality when lit from behind. Fortunately, they are
among the most stoic nature subjects, posing unflinchingly; while
the photographer explores different lighting angles. Note: With
back-lighting, unwanted glare is always a risk; be careful not
to bounce a shaft of light directly onto the front lens element
or filter. A long lens hood averts this
problem. In a
pinch, a sheet of paper rolled into a tube and slipped over your
lens will suffice.
Correct exposure is admittedly, a little trickier with backlit
subjects. With backlighting , many camera meters will be fooled
by the
intensity of the light, tending to underexpose the entire image.
Even with today's sophisticated reflected-light meters, bracketing
is still the best bet.
There was a day when I toted bellows, flash brackets, and other
heavy photographic esoterica on every outing. And from time to
time, I still use that stuff. But seeing what a few pieces of
cardboard and some aluminum foil can do has taught me that there's
still a place for low tech. After all, in the business of making
great pictures, the most important element is not the
sophistication of the gear- it's the ability of the photographer
to control light. |